Deploying the Airdrop Machine Smart Contract Using Remix IDE
This section will walk you through deploying the Airdrop Machine smart contract using Remix IDE. The Airdrop Machine is designed to distribute tokens across multiple addresses, supporting both standard and Merkle tree-based airdrops.
By following these instructions, you'll learn how to clone the necessary repository, prepare the contracts, and deploy them in Remix IDE.
Step 1: Clone the Repository
Clone the Airdrop template repository from the link below:
git clone https://github.com/rsksmart/airdrop-template.git
This repository contains all the smart contract code you need to deploy the Airdrop Machine. You’ll use this code to get the smart contract address required for your project.
Basic knowledge of deploying and testing smart contracts in Remix IDE is required. If you’re unfamiliar, please refer to the Remix Quickstart Guide for a detailed tutorial.
Step 2: Prepare the Contracts for Remix IDE
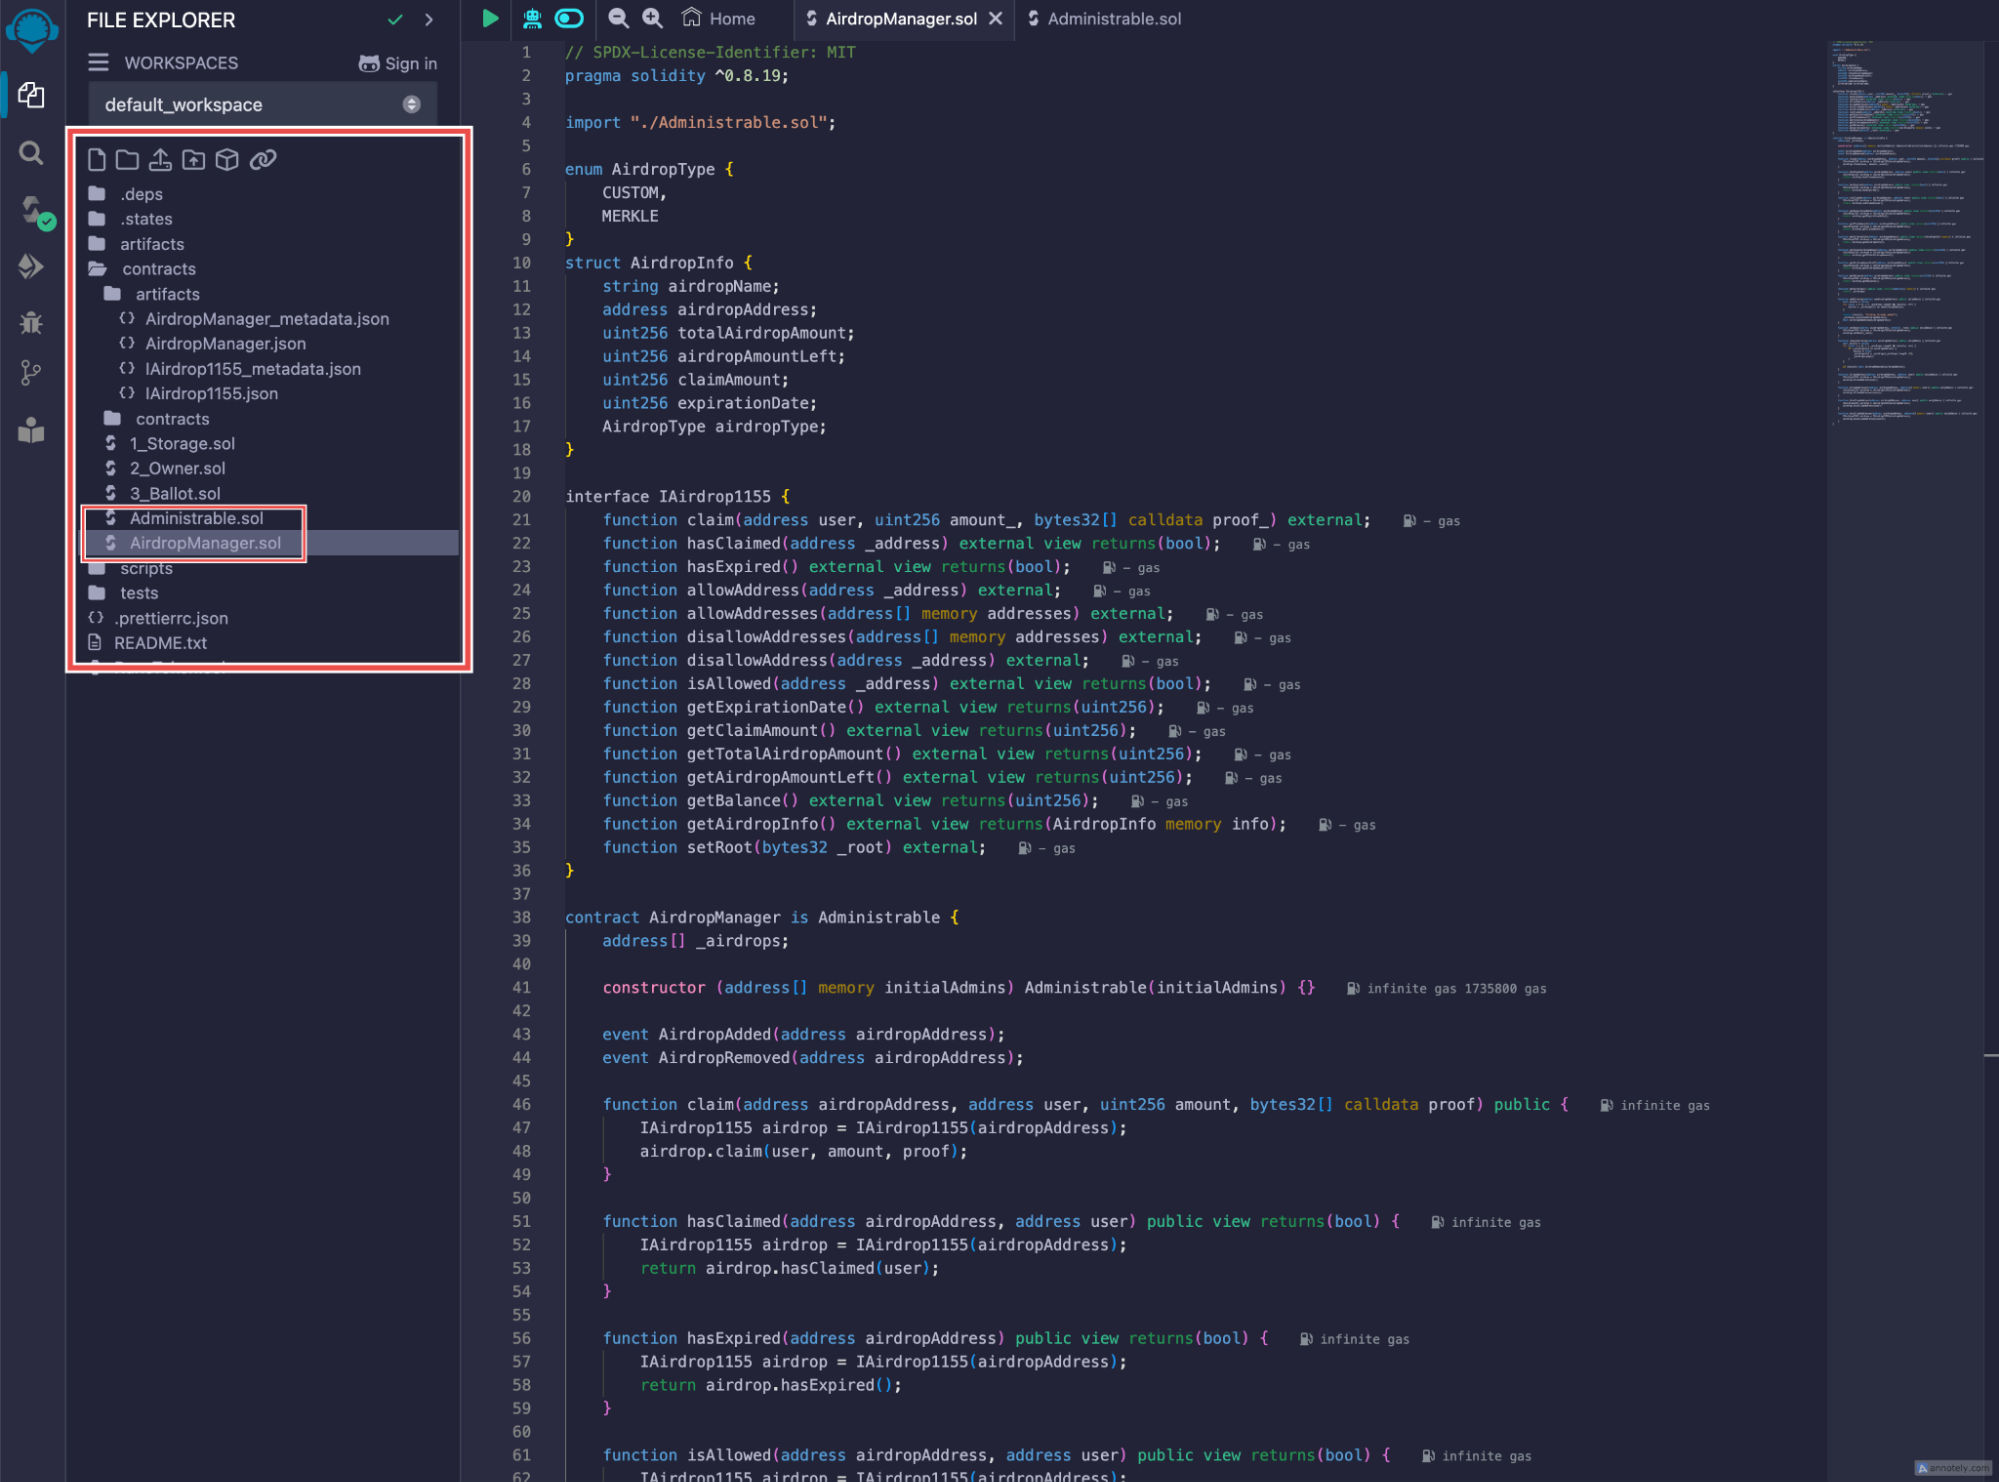
- Navigate to the cloned repository and locate the
contractsfolder. - Copy the code from both
AirdropManager.solandAdministrable.solcontracts. These files are crucial because theAirdropManagercontract imports functions fromAdministrable.sol. - Paste the contents of both contracts into Remix IDE.

Note: If you're using the latest Solidity version, be aware that some Rootstock contracts may not be fully compatible. We recommend using Solidity version 0.8.20 for better compatibility.
Step 3: Compile and Deploy the AirdropManager Contract
After pasting the contracts into Remix IDE, follow these steps to successfully compile and deploy them:
-
Select Solidity Version
- Ensure the compiler version is set to 0.8.20 to maintain compatibility with Rootstock contracts.
-
Compile the AirdropManager.sol Contract
- Click the Compile AirdropManager.sol button to compile the contract.
- Make sure there are no errors before proceeding to the next step.
-
Deploy the AirdropManager Contract
- Go to the Deploy & Run Transactions tab in Remix.
- From the Environment dropdown, select the Remix VM (Cancun)
- In the Accounts section at the top of Remix, copy the first account address.
- Paste this address into the contract deployment input field.
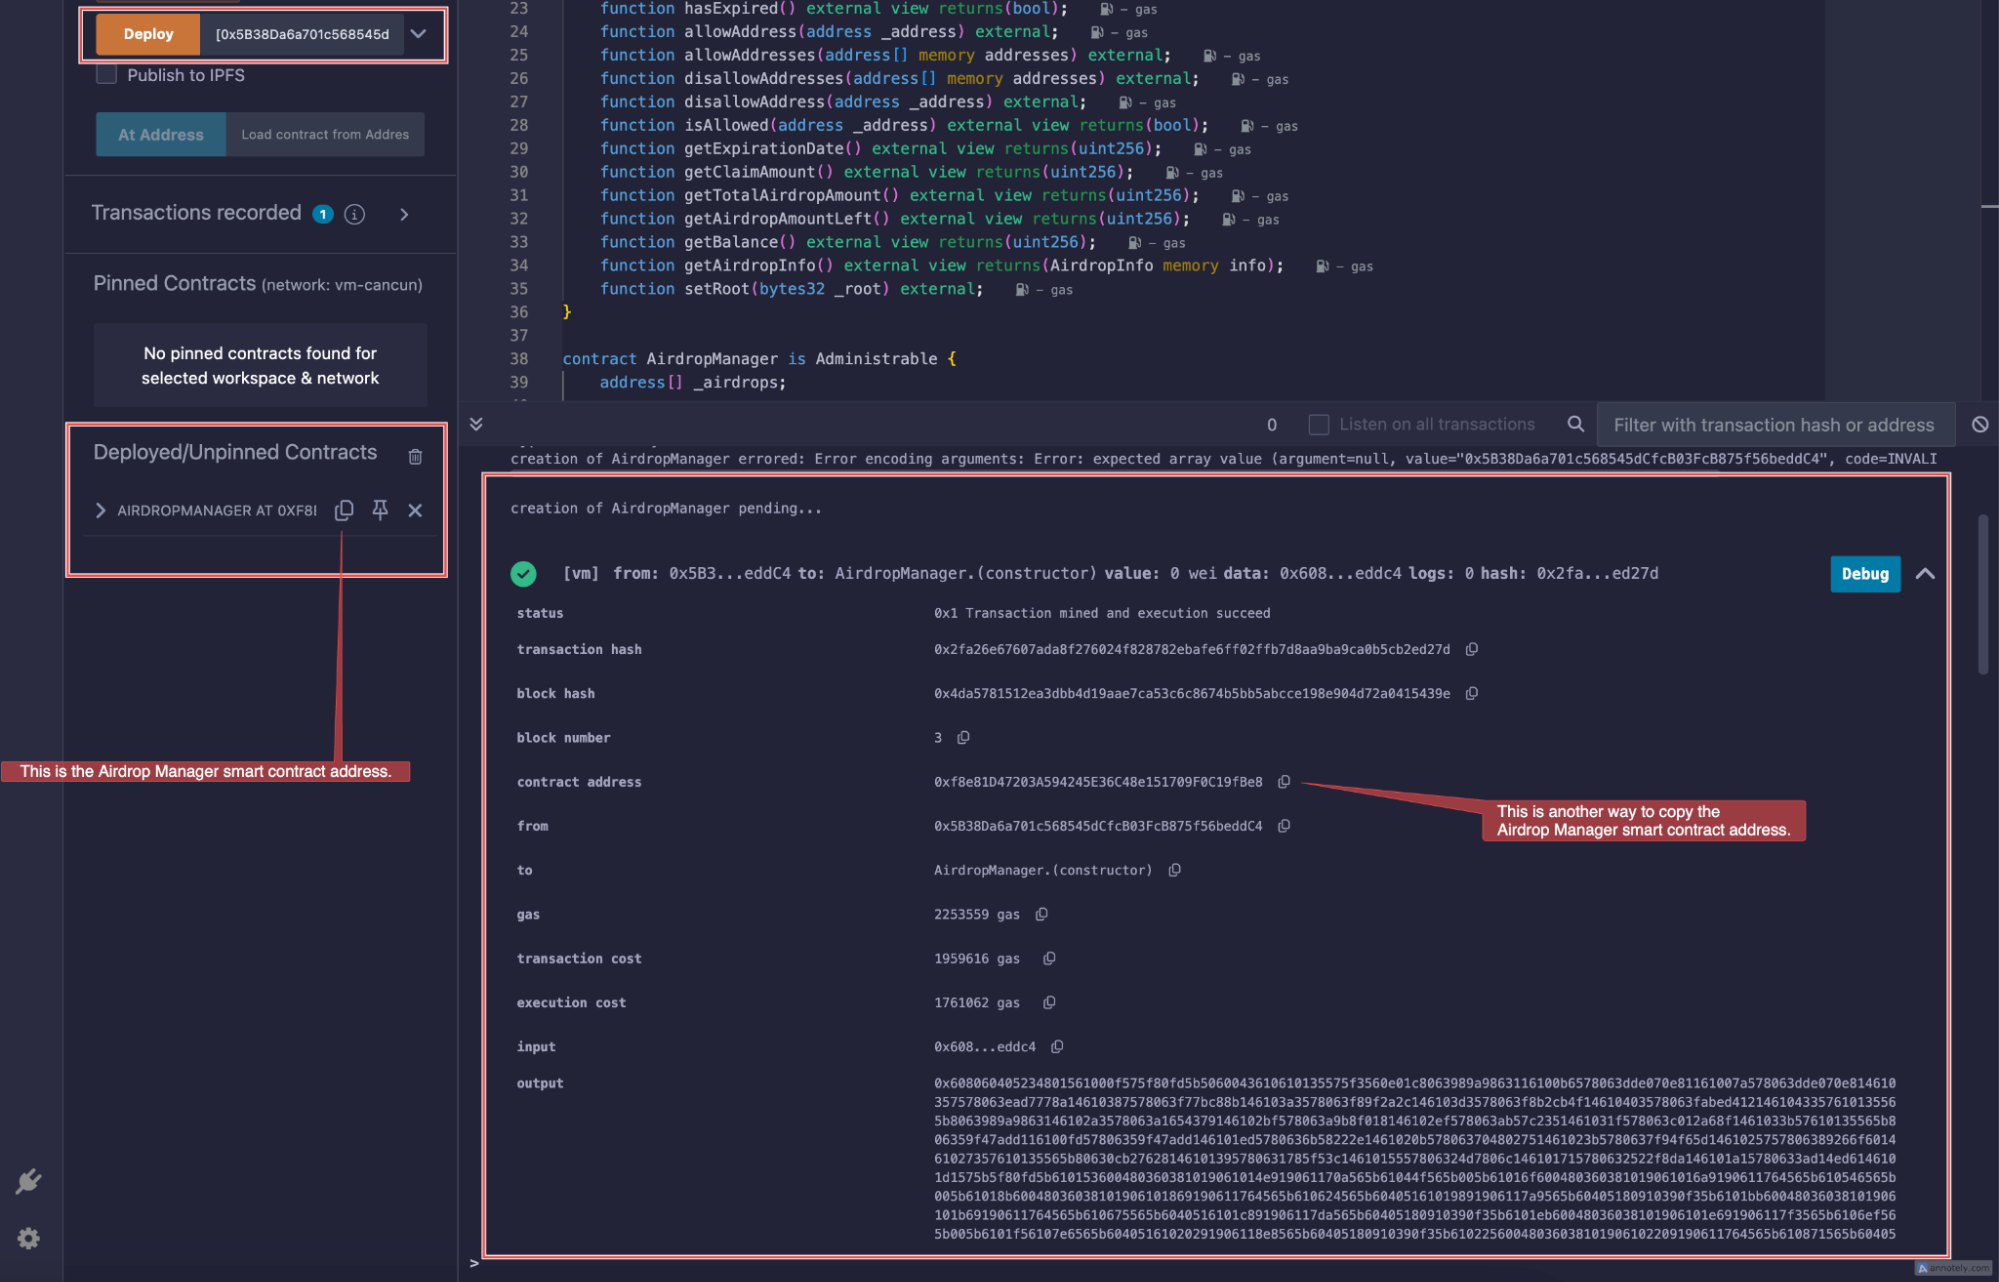
Make sure to enter the address inside square brackets, like this: [0x5B38Da6a701c568545dCfcB03FcB875f56beddC4]. If entered incorrectly
(e.g., without brackets), you will encounter the following error:
“creation of AirdropManager errored: Error encoding arguments: Error: expected array value (argument=null, value="0x5B38Da6a701c568545dCfcB03FcB875f56beddC4", code=INVALID\_ARGUMENT, version=abi/5.7.0)”.
Double-check that the account address is properly formatted with square brackets to avoid this issue.

4. Deploy the Contract
- After correctly entering the address, click Deploy.
- This will deploy the
AirdropManagercontract, which manages the entire airdrop process, including both custom and Merkle tree-based airdrops.
5. Copy the Contract Address

- Once deployment is successful, copy the contract address of the deployed
AirdropManager. - This address will be required in your Airdrop UI project.