Setup Your Own Airdrop Giveaway Machine
Prerequisite
Before going further in this guide, it's essential to have the following foundational knowledge and tools in place:
- Familiarity with Remix IDE:
- Understanding how to navigate and utilize Remix IDE is crucial. This includes knowledge of its features, such as the Solidity compiler, file management, and debugging tools. Being comfortable with the IDE will enable you to write, test, and deploy smart contracts efficiently.
- Basic Knowledge of Solidity:
- A foundational grasp of Solidity, the primary programming language for Ethereum smart contracts, is necessary. This should include familiarity with basic syntax, data types, functions, and contract structures. You should be able to write simple smart contracts and understand how to interact with them.
- Git Installation:
- Ensure that Git is installed on your machine. Familiarity with Git will help you manage version control effectively, collaborate with others, and track changes to your code.
Installation
To install and run the Runes giveaway machine Airdrop claim locally, follow these steps:
- Clone the Repository:
git clone https://github.com/rsksmart/airdrop-ui.git
cd airdrop-ui
- Install Dependencies:
Run the following command to install the necessary packages:
npm install
- Configure Environment Variables: Create a
.envfile in the root directory and add the necessary environment variables. Below is an example of how to configure the environment variables:
NEXT_PUBLIC_AIRDROP_MANAGER_ADDRESS=<your_airdrop_manager_address>
NEXT_PUBLIC_RPC_URL=<your_rpc_url>
NEXT_PUBLIC_EXPLORER=<your_blockchain_explorer>
Explanation with added context for each environment variable
NEXT_PUBLIC_AIRDROP_MANAGER_ADDRESS=<your_airdrop_manager_address>
This variable specifies the address of the Airdrop Manager smart contract. To ensure your application interacts with it correctly, you'll need to deploy this contract using Remix IDE. After deployment, copy the contract's address and paste it here.
For detailed instructions on obtaining the Airdrop Manager address, please refer to the Deployment section.
NEXT_PUBLIC_RPC_URL=<your_rpc_url>
This variable holds the URL of the Remote Procedure Call (RPC) endpoint for your blockchain network. It allows your application to communicate with the blockchain by sending requests and receiving responses. Be sure to replace <your_rpc_url> with the actual URL provided by your blockchain service provider.
The Remote Procedure Call (RPC) URL is how your Runes Mock Bridge interacts with the Rootstock (RSK) blockchain.
- To get the RSK RPC URL, go to the RSK Dashboard and log in. After logging in, you can create an API key that will give you access to the RPC URL.
- Once the key is generated, you can use it to set up this variable, which allows your bridge to communicate with the blockchain.
NEXT_PUBLIC_EXPLORER=https://explorer.testnet.rootstock.io/tx
This variable contains the URL of your blockchain explorer. A blockchain explorer is a tool that allows you to view transactions, addresses, and other activities on the blockchain. Replace <your_blockchain_explorer> with this https://explorer.testnet.rootstock.io/tx
Make sure to replace the placeholders with your actual values before deploying your application!
- Run the Development Server:
To start the development server, use the command:
npm run dev
Once installed, this project can be used to claim airdrops via a decentralized application, adding another layer of utility to the Bitcoin ecosystem.
Interacting with the Frontend
Once you have the application running locally, follow these steps to interact with the airdrop functionality:
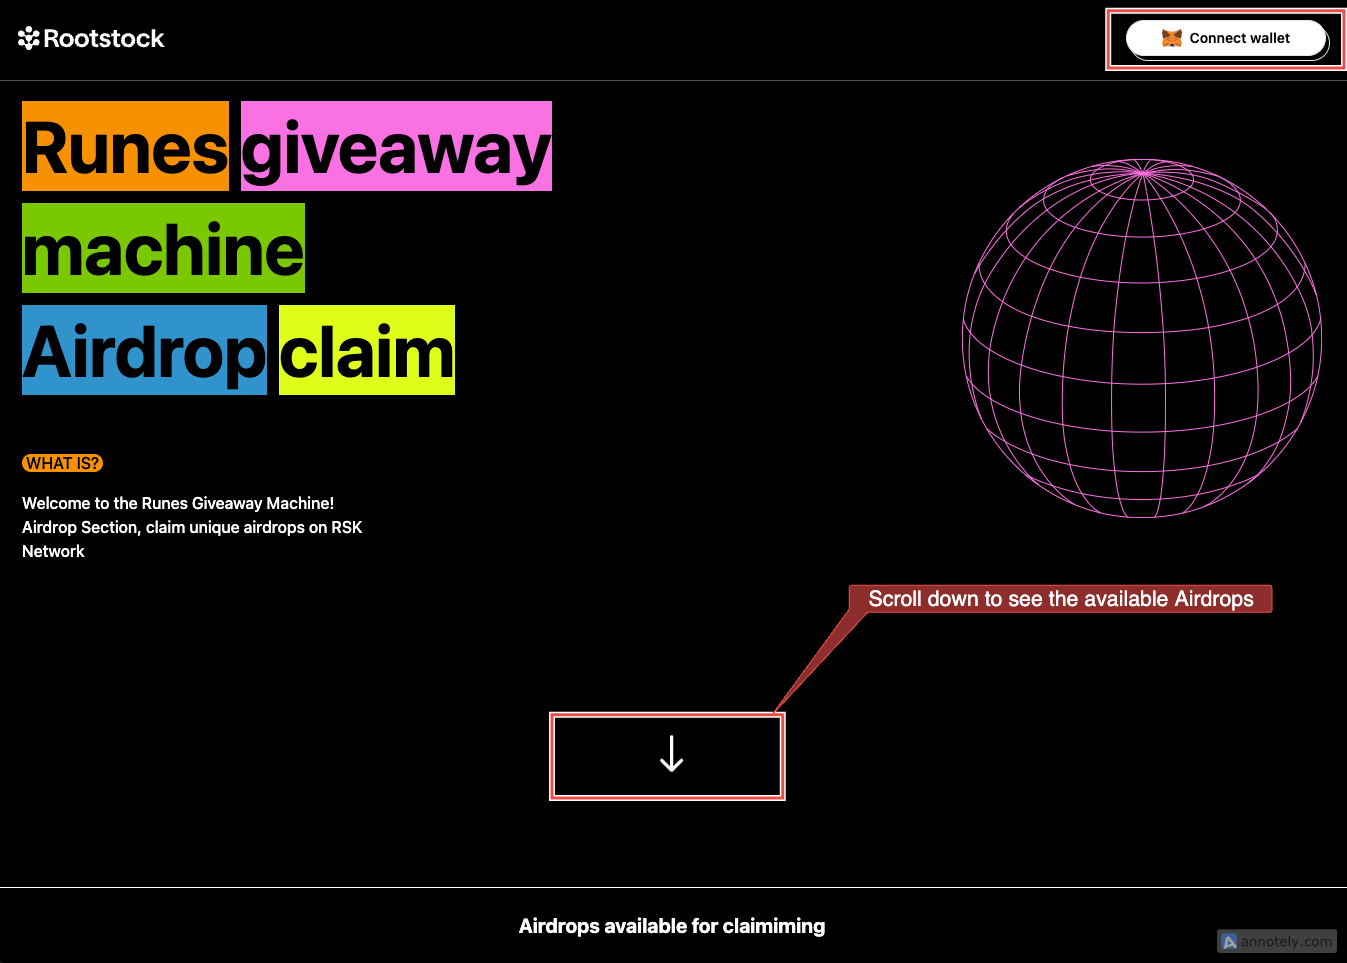
- Connect Your Wallet:

- Click on the "Connect Wallet" button.
- This will prompt you to connect to your MetaMask wallet. Follow the on-screen instructions to complete the connection.
- Wait for Airdrops to Load:
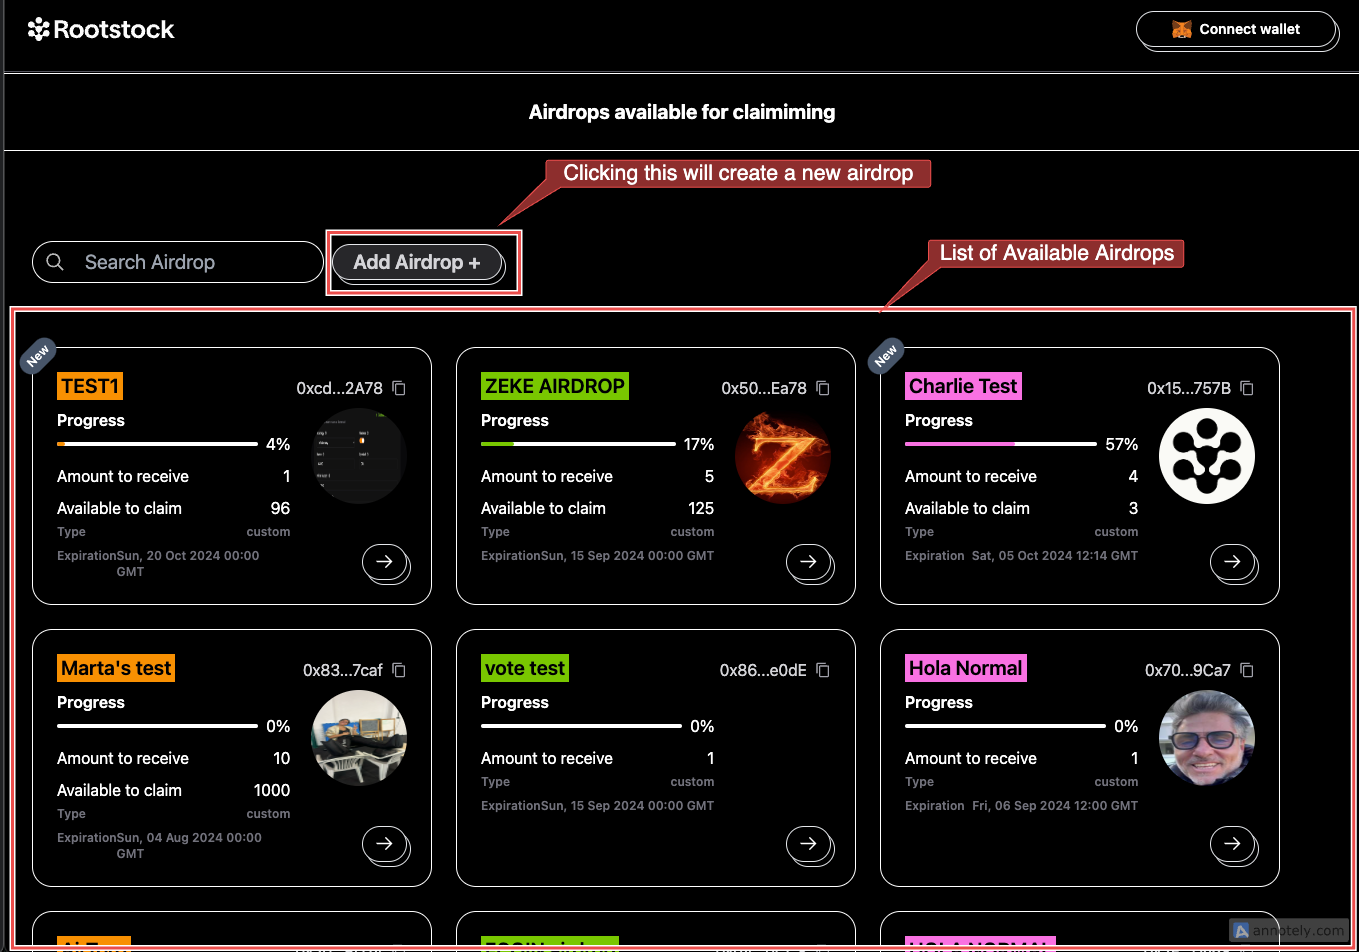
- After connecting your wallet, give it a few moments for the list of available airdrops to load. You can find these airdrops by scrolling down the screen.
- Choose Your Action:

- At this point, you have two options:
- Create a new airdrop, or
- Claim available airdrops.
- Create a new airdrop, or
- Understanding the Airdrop Card:
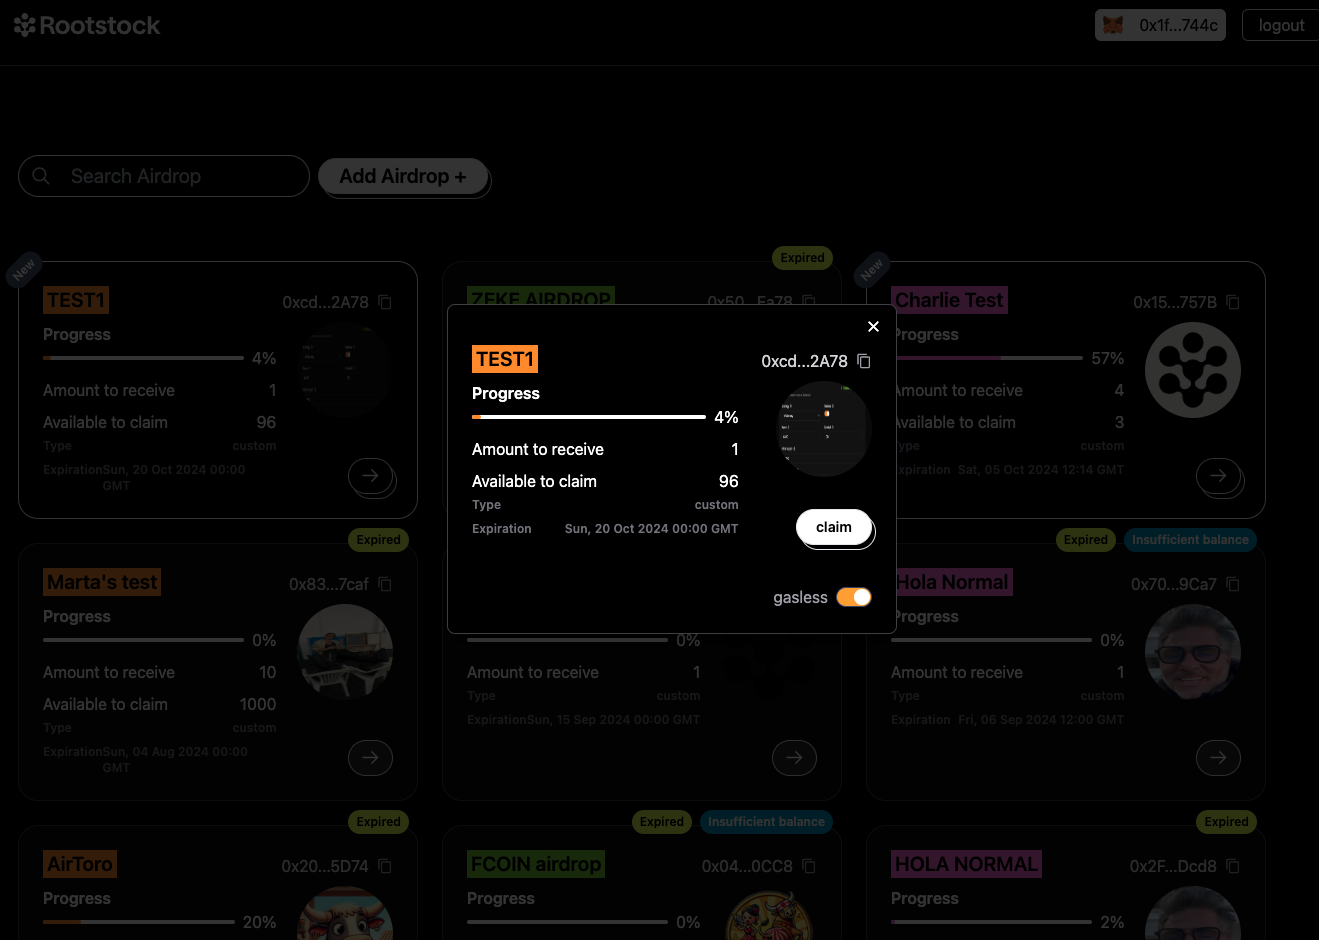
- The first airdrop on the list is called “Test”. Here's a breakdown of what you’ll see on the airdrop card:
- Progress bar showing the status of the airdrop.
- Amount to receive, which indicates how many tokens you can claim.
- Available to claim section with the wallet address eligible for the airdrop.
- A "Claim" button.
- The first airdrop on the list is called “Test”. Here's a breakdown of what you’ll see on the airdrop card:
- Claiming the Airdrop:

- Click the "Claim" button on the airdrop card.
- You will be directed to a screen where you can proceed to claim your tokens.
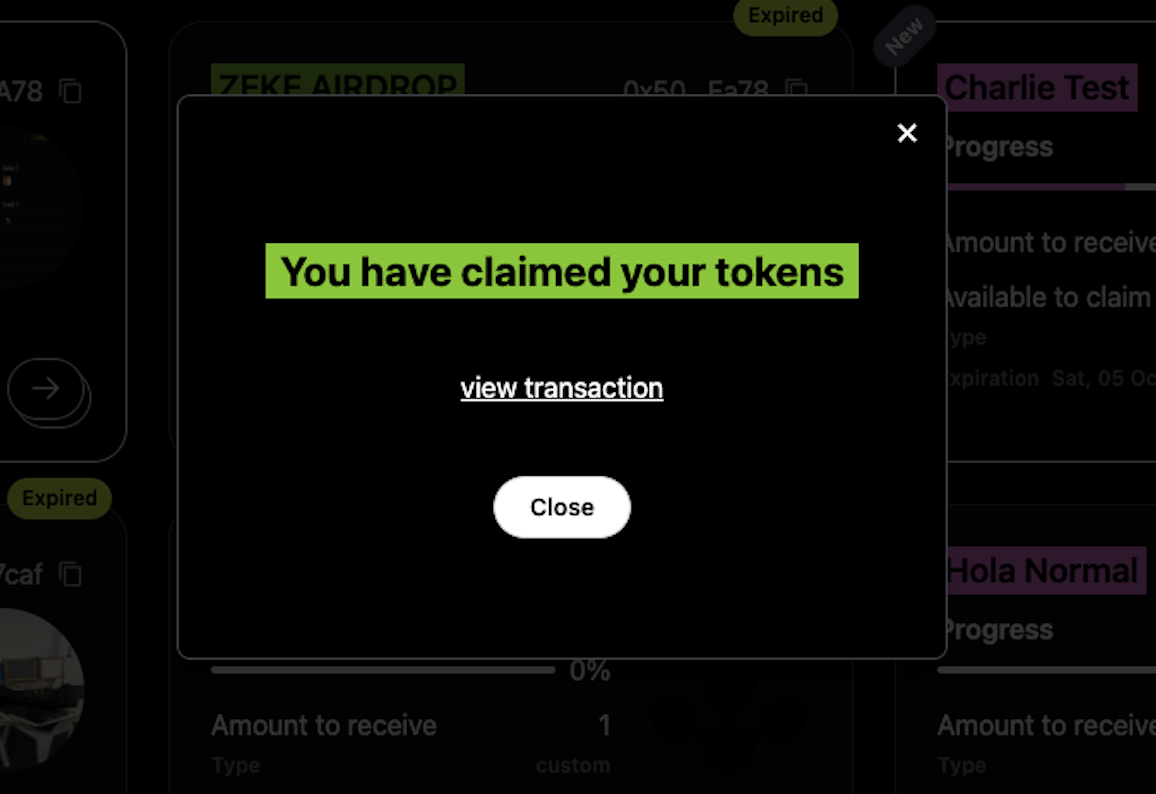
- Wait for a few moments for the transaction to complete.
- Viewing the Transaction:
- After successfully claiming your airdrop, click on the "View Transaction" button.
- This will take you to the Rootstock explorer, where you can view the details of your transaction.
